Contact Info
- Lilongwe, Malawi
- +265 899 25 21 95 (Whatsapp)
- contact@webmobyle.com
- Working Days: Monday - Friday
Download Audio: Receiving and Sending Other Mail Through Gmail

For those of you who have been using Gmail as your email account of choice, you would agree with me, that it is simply awesome!
As awesome as Gmail is, most of us also tend to have several other email services that we use, and it becomes a nightmare logging into so many email accounts, just trying to get to grips with our email. The good news is that you can set up your Gmail account to receive email from other email accounts, within Gmail.
I am assuming that you already have a Gmail account and several other email accounts, with services like Microsoft Outlook, or even a private mail server, and would like to manage all those emails from within your Gmail account.
The process is fairly easy, but you need to have password access to the other accounts and know the other email services’ POP and SMTP mail server addresses. You can Google the POP and SMTP mail server address for your email service, or find out from your service provider.
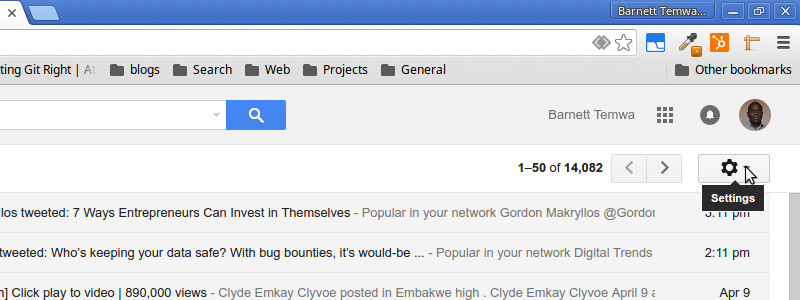
1. Log in to Gmail and click the gear icon, to access your Gmail settings.
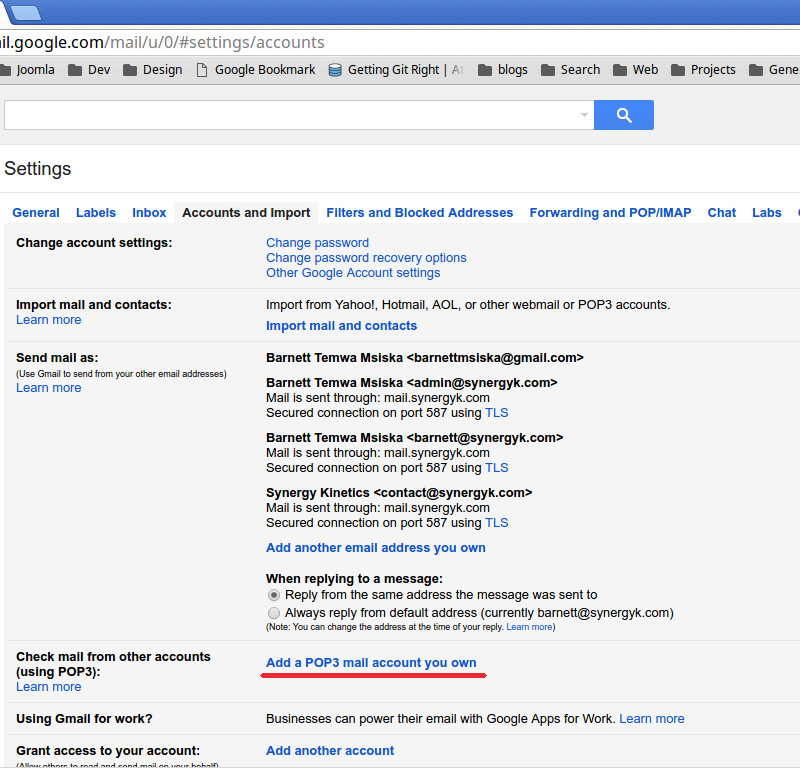
2. In Settings, go to the “Accounts and Imports” Tab and click, “Add a POP3 mail account you own”, on the “Check mail from other accounts (using POP3):” section.
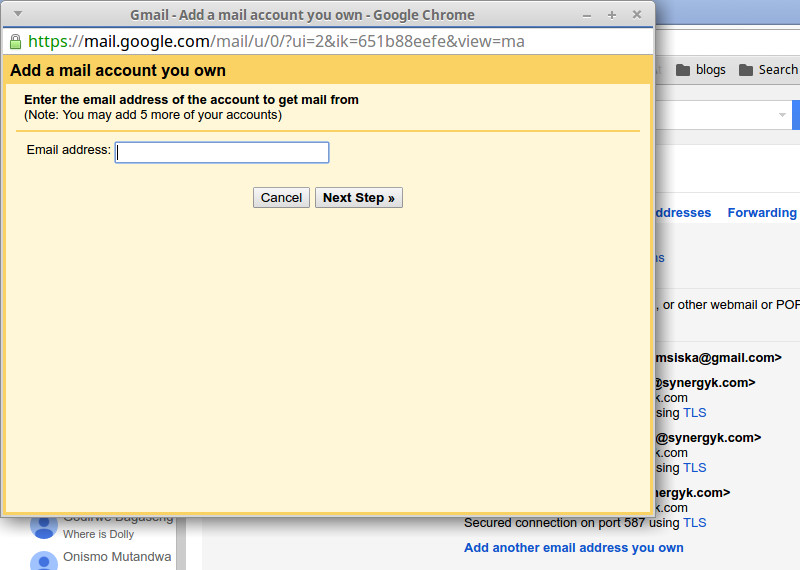
3. Enter the email address in the pop up that appears, and click “Next Step”.
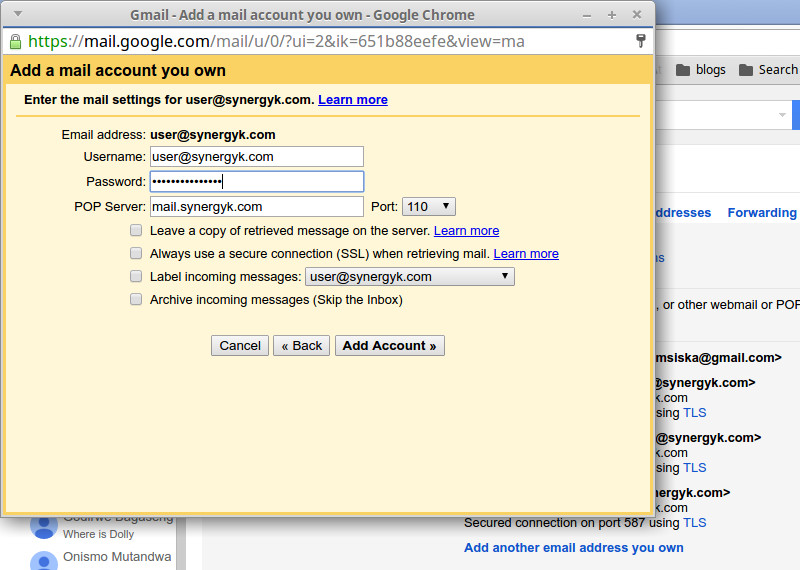
4. On the next screen, fill in the username, password, and POP Mail Server. Note that for some mail servers, you have to provide the full email address for the username. Take note of the several check boxes for what to do with the retrieved mail. If in doubt, leave them as they are. Finally click “Add Account”.
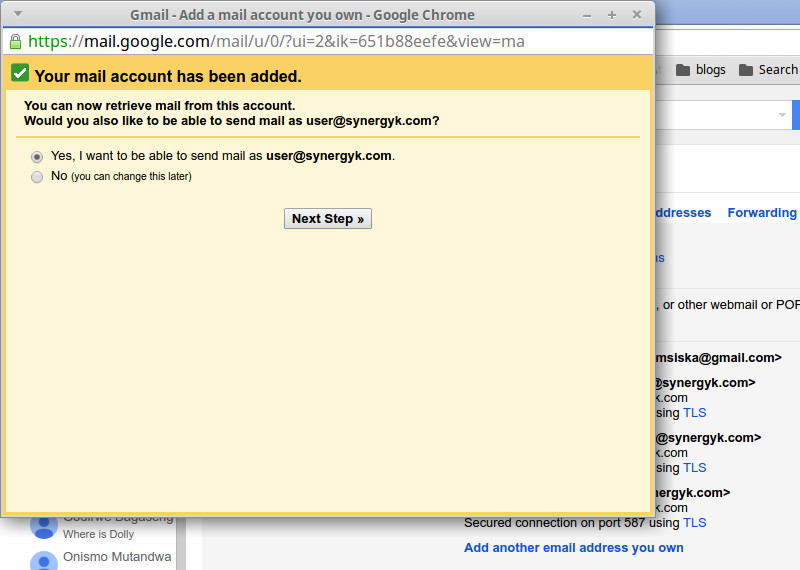
5. Click “Next Step”, on the following screen, to be able to send mail as the added email address.
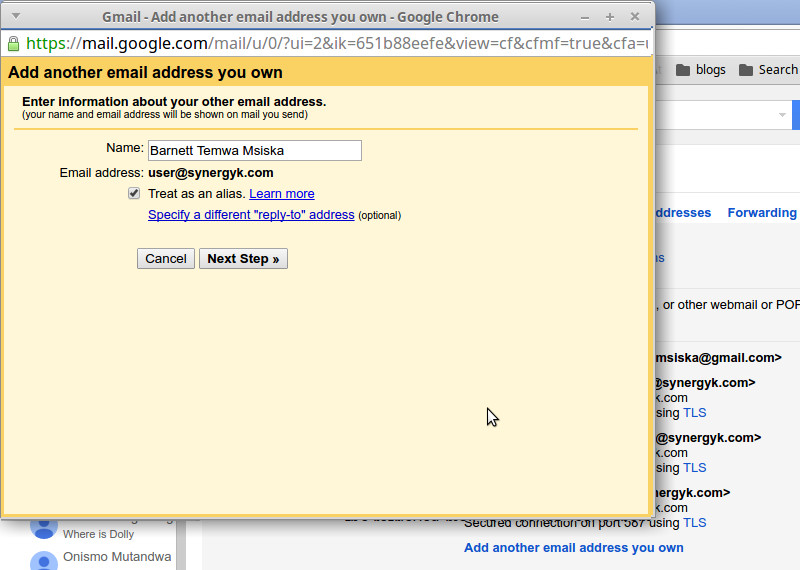
6. Choose the name to be used with the added email address on the next screen, and click “Next Step”.
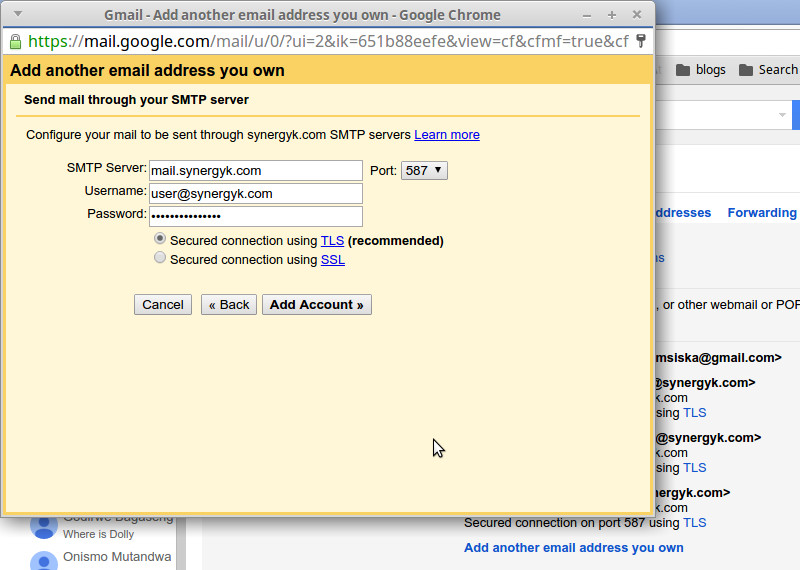
7. Next configure your mail to be sent through the added email’s SMTP server. And click “Add Account”. Remember that for some servers, the username is the full email address.
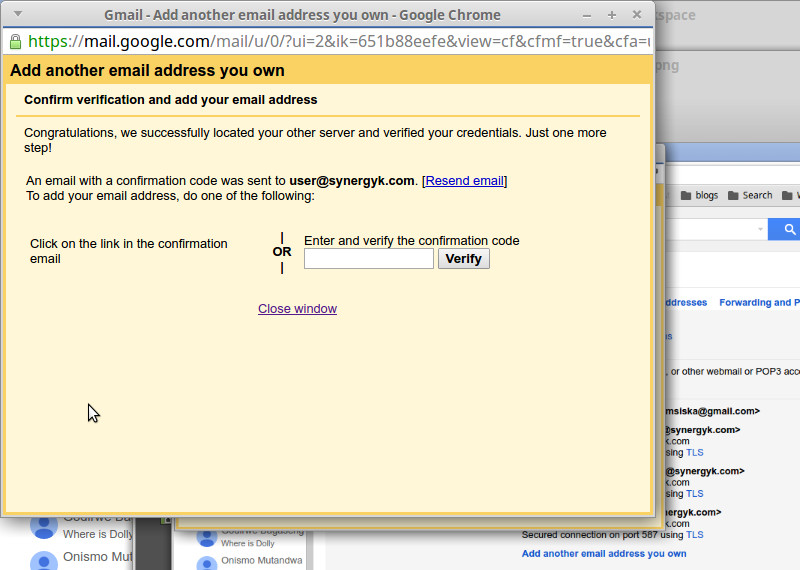
8. The final step is the confirmation, where an email gets sent to the inbox of the added email address, from which you confirm, by either clicking the link in the email or copying the code and pasting it in your Gmail set up window.
That’s it. You are now done and can receive the emails from the added account from within Gmail. You may also choose to send mail as the added email from within Gmail. I manage about five emails this way, and just use the Gmail user interface, including the mobile app, to handle all my mail. I have found this little setup to be quiet handy, and I hope you will find it useful as well.
Want to hear some more from the Webmobyle Blog? Please


We use cookies to improve your experience on our site. By using our site, you consent to cookies.
Manage your cookie preferences below:
Essential cookies enable basic functions and are necessary for the proper function of the website.
These cookies are needed for adding comments on this website.
Statistics cookies collect information anonymously. This information helps us understand how visitors use our website.
Google Analytics is a powerful tool that tracks and analyzes website traffic for informed marketing decisions.
Service URL: policies.google.com (opens in a new window)
SourceBuster is used by WooCommerce for order attribution based on user source.
Marketing cookies are used to follow visitors to websites. The intention is to show ads that are relevant and engaging to the individual user.
Google Maps is a web mapping service providing satellite imagery, real-time navigation, and location-based information.
Service URL: policies.google.com (opens in a new window)

Leave A Comment